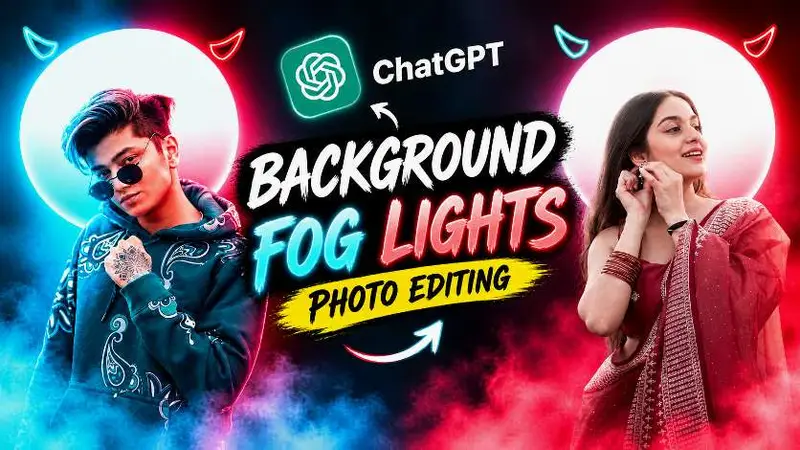
A fog lights photo editing prompt can turn an ordinary portrait into a cinematic social media image with glowing rings, colored haze, and realistic studio-style depth. The effect works especially well when a person is placed inside a prepared background rather than surrounded by a randomly generated scene. With the right image pair and a careful workflow, you can create a polished result while keeping the subject recognizable.
This guide explains how to plan the edit, prepare your photos, control environmental light, and avoid the common mistakes that make AI portraits look artificial. The same approach can support Instagram posts, profile pictures, video thumbnails, fashion portfolios, and creator branding.
Fog Lights Photo Editing Prompt for a Cinematic Portrait
The visual formula is simple: a dark or neutral setting, a strong circular light source, controlled colored illumination, and a modest amount of smoke. The background supplies the atmosphere, while the person remains the main point of attention. That balance gives the image a premium appearance without making the effects overpower the face.
A strong edit should look as though the subject was photographed in the environment from the beginning. The person must share the same perspective, brightness, shadow direction, color response, and depth as the background. If those details do not match, even an attractive design can look like a basic cutout.
How to Prepare Images for an AI Fog Lights Portrait
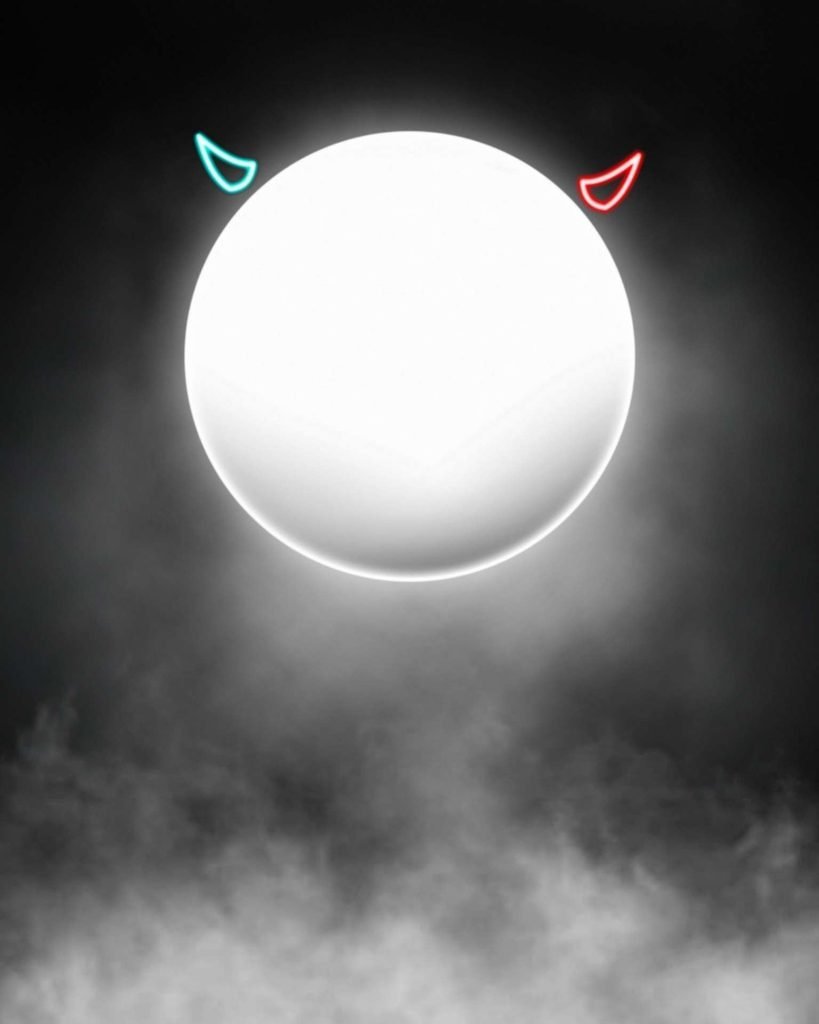
Before using a fog lights photo editing prompt, select two images with clear roles. The first should be an empty background or visual template containing the circular light, smoke, perspective, and composition. The second should be a personal portrait with a visible face and enough body area for a natural blend.
Choose a compatible portrait: A front-facing or slightly angled photo usually blends more naturally than an extreme side profile.
Check the light direction: The source image should have a clear bright side, shadow side, or rim-light direction.
Leave room around the subject: A portrait with some space near the head and shoulders gives the editor more flexibility.
Use a clean, detailed image: Sharp hair, eyes, clothing, and facial edges reduce masking problems.
Match the final format: A vertical 4:5 canvas is useful for portrait posts and many mobile-first layouts.
Do not choose a background only because its colors look attractive. The camera angle and scale matter just as much. A low-angle background paired with a flat, overhead portrait can create an obvious mismatch, even when the neon colors are impressive.
Neon Circle and Soft Fog Composition
This first prompt section is designed for a controlled portrait composition built around a luminous circular element and atmospheric depth. Use it when you want the background to remain dominant while the person appears naturally positioned within the scene.
🚀 Create a premium photorealistic Instagram portrait using EXACTLY TWO uploaded images. IMAGE 1 = EMPTY BACKGROUND / MASTER TEMPLATE. IMAGE 2 = PERSON’S OWN PHOTO. Use ONLY Image 1 and Image 2. The audience will NOT provide any additional reference image. Use Image 1 as the exact master background and keep every part of Image 1 completely unchanged. Do not redesign, recreate, replace, remove, crop, repaint, or modify any part of the background. Preserve the complete background, lighting, colors, circular design, neon elements, smoke, perspective, depth, camera angle, composition, and every existing background detail exactly as provided. Take only the real person from Image 2 and naturally integrate them into Image 1. Preserve the person’s real face, identity, facial features, hairstyle, hair texture, clothing, clothing colors, patterns, logos, stickers, accessories, and natural body proportions. Do not change their identity or make them look like a different person. Keep the person slightly smaller and lower in the frame, centered naturally within the main composition of Image 1, with enough original background visible around them. Automatically adjust the person’s scale, position, height, and framing according to Image 2 so the composition remains balanced and cinematic. IMPORTANT LIGHTING RULE: Image 1 itself is the ONLY environmental lighting and color source. Analyze the actual lighting, colors, brightness, shadows, and glow present in Image 1 and naturally match that lighting onto the person. If Image 1 contains strong blue/cyan, red/magenta, or other colored environmental lighting, realistically reflect those exact colors onto the appropriate areas of the person’s face, hair, neck, shoulders, and clothing according to the direction and intensity of the background light. The colored reflections must look like real environmental light, with realistic gradients, highlights, shadows, rim lighting, and natural falloff. If Image 1 does NOT contain colored lighting, DO NOT artificially add blue, cyan, red, magenta, or any other colored lighting to the person. For a neutral, white, grey, or monochrome background such as a white circular light with grey smoke, keep the person’s original natural skin tone, hair color, and clothing colors natural and neutral, while matching the brightness, softness, shadows, and overall neutral lighting of Image 1. Never force colored lighting when it is not present in Image 1. Do not use a blue/red color overlay or artificial color filter. The person’s lighting must always be determined by the actual background provided as Image 1. Make the person look as if they were genuinely photographed inside the exact environment of Image 1. Match perspective, camera angle, depth, brightness, contrast, shadows, ambient light, reflections, and color response. Preserve the smoke from Image 1 exactly in style, density, direction, and overall amount, allowing it to naturally pass around and slightly in front of the lower part of the person to create realistic foreground depth. Do not add excessive smoke. Keep the face sharp, detailed, recognizable, and natural. Preserve eyes, facial structure, hair details, and natural skin texture. If Image 2 is low-quality, dark, or slightly blurry, intelligently enhance clarity, exposure, and detail while preserving the exact identity and natural appearance. Do not create an artificial AI-looking face. Maintain natural body proportions and adapt the positioning naturally to fit the composition without unnecessary body changes. If hands, feet, or other body parts are partially cropped in Image 2, intelligently handle the framing while keeping anatomy natural. Create clean realistic hair and body edges with no white outline, black outline, artificial halo, rough masking, or cutout effect. Do not add another person, extra objects, text, new logos, or watermarks. Do not remove or redesign anything from Image 1. Do not change the person’s identity. Do not make the person oversized or too high. Do not force colors that are not present in Image 1. Do not create distorted fingers, hands, limbs, face, hair, skin, or clothing. Do not introduce AI artifacts. Final output exactly 1080 × 1350 pixels, exactly 4:5 portrait aspect ratio, Instagram-ready, Full HD, extremely sharp, premium quality, photorealistic, realistic skin texture, realistic environmental lighting, realistic shadows, clean details, and professional cinematic finish. The final result must look like the real person from Image 2 was genuinely photographed inside the exact environment of Image 1, with the person naturally positioned and scaled to fit the background and with the person’s lighting automatically matching ONLY the actual lighting and colors present in Image 1.
For the cleanest result, upload the background first and the personal portrait second if your editing tool uses image order. Review the face, hairline, shoulders, and lower body carefully, because these areas reveal whether the subject was blended into the environment convincingly.
AI Fog Lights Portrait Editing with Realistic Color
Color should behave like light, not like a flat filter. Cyan, blue, red, or magenta tones need to appear gradually across the side of the face, hair, neck, and clothing that faces the glow. The opposite side should normally retain deeper shadows or a more neutral tone.
This principle is central to a successful fog lights photo editing prompt. Ask for environmental illumination based only on the actual background. If the template is neutral, the subject should not receive invented blue or red highlights. When the background has colored sources, the reflections should follow their direction and intensity.
Editing area
Natural result
Common problem
Face
Soft color on the lit cheek, temple, jaw, and neck
A solid color overlay across the whole face
Hair
Fine rim light along strands facing the glow
A bright artificial outline around the head
Clothing
Subtle reflections that follow folds
Unchanged clothing beside strongly lit skin
Smoke
Depth near the lower body and background
Heavy haze covering facial details
For more context on how color and light influence visual perception, the Wikipedia overview of color theory offers a useful foundation. You do not need advanced design knowledge, but understanding warm and cool contrast makes it easier to judge whether an edit feels balanced.
Blue, Red, and Magenta Environmental Lighting
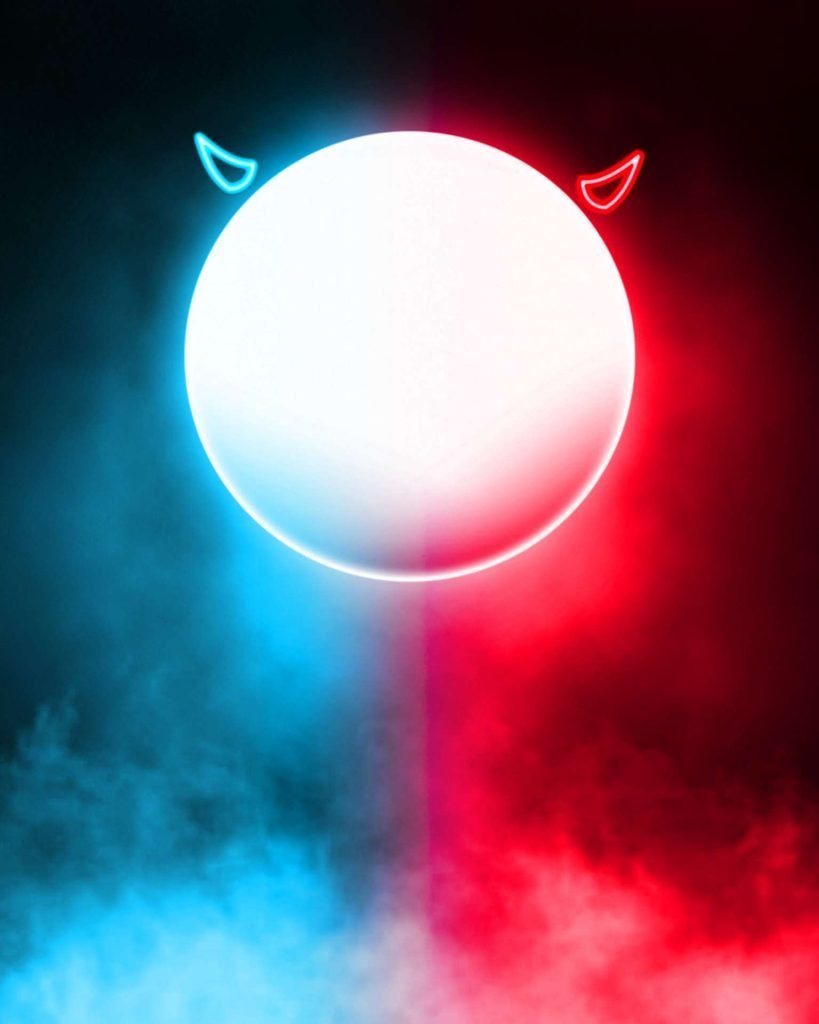
This second prompt section suits a more vivid neon portrait where the circular background includes clearly visible cool and warm light sources. It emphasizes believable illumination across the face as well as the hair and clothing.
🚀 Create a premium photorealistic Instagram portrait using EXACTLY TWO uploaded images. IMAGE 1 = EMPTY BACKGROUND / MASTER TEMPLATE. IMAGE 2 = PERSON’S OWN PHOTO. Use ONLY Image 1 and Image 2. The audience will NOT provide any additional reference image. Use Image 1 as the exact master background and keep every part of Image 1 completely unchanged. Do not redesign, recreate, replace, remove, crop, repaint, or modify any part of the background. Preserve the complete circular neon light structure, blue/cyan and red/magenta glowing elements, smoke, colors, lighting, perspective, depth, camera angle, composition, and every existing background detail exactly as provided. Take only the real person from Image 2 and naturally integrate them into Image 1. Preserve the person’s real face, identity, facial features, hairstyle, hair texture, clothing, clothing colors, patterns, logos, stickers, accessories, and natural body proportions. Do not change their identity or make them look like a different person. Keep the person slightly smaller and lower in the frame, centered naturally inside the circular neon composition, with enough original background visible around them. Automatically adjust scale, position, height, and framing according to Image 2 so the composition remains balanced and cinematic. MOST IMPORTANTLY, the blue/cyan and red/magenta light from Image 1 must physically illuminate the PERSON’S FACE as well as the hair and clothing. Do NOT apply the colored lighting only to the clothes or body. The face MUST receive visible but realistic environmental colored light. The blue/cyan light should softly appear on the blue-lit side of the face, including the temple, cheek, jawline, side of the nose, ear, hairline, and nearby neck area. The red/magenta light should softly appear on the opposite side of the face, especially along the temple, cheek, jawline, ear, hairline, and neck. Keep the center/front of the face mostly natural so the skin still looks realistic, while the side areas clearly catch the surrounding neon colors. The colored light on the face must look like real reflected light from the neon background, with smooth gradients, natural falloff, realistic highlights, subtle shadows, and believable skin interaction. It must NOT look like makeup, paint, a color filter, a flat overlay, or an artificial colored face. The effect should be subtle enough to remain realistic but clearly visible at normal viewing size. The face must not remain completely neutral or normally lit while only the clothes receive blue/red colors. The blue/cyan and red/magenta lighting must also visibly interact with individual hair strands, especially along the illuminated sides, creating realistic colored highlights and rim light. The same environmental lighting should naturally continue from the face to the neck, shoulders, sleeves, and clothing, but it must NOT spread uniformly across the entire shirt. Different surfaces must receive different amounts of light according to their position relative to the neon sources. Preserve the original clothing colors, patterns, logos, stickers, and designs while allowing realistic blue/cyan and red/magenta reflections to appear naturally on selected areas. The person should look as if they were actually standing inside the blue-and-red neon environment when the photograph was taken. Match the direction, intensity, brightness, contrast, shadows, reflections, glow, and color response of Image 1. Add realistic contact shadows and environmental reflections where necessary. Preserve the smoke from Image 1 exactly in style, density, direction, and overall amount, with natural smoke passing around and slightly in front of the lower body to create realistic depth. Do not add excessive smoke. Keep the face sharp, detailed, recognizable, and natural. If Image 2 is low-quality or dark, improve clarity and exposure naturally without changing identity or facial structure. Maintain natural body proportions and adapt the pose/framing naturally without unnecessary body changes. If hands, feet, or other body parts are partially cropped in Image 2, intelligently handle the framing while keeping anatomy natural. Create clean realistic hair and body edges with no white outline, black outline, artificial halo, rough masking, or cutout effect. Do not add another person, extra objects, text, new logos, or watermarks. Do not remove or redesign anything from Image 1. Do not change the person’s identity. Do not make the person oversized or too high. Do not use a flat blue/red color filter. Do not make the colored lighting weak, invisible, or limited only to clothing. Do not leave the face neutrally lit. Do not create distorted fingers, hands, limbs, face, hair, skin, or clothing. Final output exactly 1080 × 1350 pixels, exactly 4:5 portrait aspect ratio, Instagram-ready, Full HD, extremely sharp, premium quality, photorealistic, realistic skin texture, realistic environmental lighting, realistic shadows, clean details, and professional cinematic neon finish. The final result must look like the real person from Image 2 was genuinely photographed inside the exact environment of Image 1, with the person slightly smaller and lower in the circular composition, and with clearly visible yet natural blue/cyan and red/magenta light softly reflecting on BOTH SIDES OF THE FACE, hair, neck, shoulders, and selected clothing surfaces. FACE LIGHTING IS ESSENTIAL: the colored neon reflections must be visibly present on the face, not only on the clothes.
After generation, zoom in on the eyes, nose, lips, and hair edges. If the face is too colorful, ask for a softer falloff rather than lowering all saturation, because global desaturation can make the background look dull.
Fog Lights Photo Editing Prompt Settings That Improve Results
The best output is not always the most dramatic one. Strong effects can hide facial detail, reduce skin realism, and make the person appear pasted into the design. Use these practical checks before exporting:
Keep the subject slightly smaller: Visible background space strengthens the circular composition and creates depth.
Protect identity: Compare the generated face with the original and reject changes to facial structure, hairstyle, or expression.
Use restrained smoke: Haze should support separation, not cover the eyes or mouth.
Inspect body proportions: Look for stretched shoulders, distorted hands, narrow limbs, or oversized heads.
Check edge quality: Remove white halos, dark outlines, jagged hair, and leftover background pixels.
Export at a social-ready size: A 1080 by 1350 pixel file works well for a vertical 4:5 post.
If the original portrait is dark or slightly soft, moderate enhancement can improve clarity. However, avoid excessive sharpening. Over-sharpened skin and hair often create an artificial texture that becomes especially visible on mobile screens.
Where to Use an AI Fog Lights Portrait
This style is flexible because it combines a recognizable person with a memorable background. It can give a consistent visual identity to a creator who wants profile images, thumbnails, and promotional graphics to feel connected.
Social posts: Use the vertical format for a striking feed image.
Profile photos: Crop carefully so the face remains visible in a small circular display.
Video thumbnails: Keep the subject large enough to remain readable at a reduced size.
Gaming or fashion branding: Use controlled color contrast to support a bold identity.
Photography portfolios: Present the edit as an example of compositing and light matching.
When publishing on Instagram, preview the image on a phone before posting. Check whether the darker background hides important clothing details and whether the face still attracts attention when the image is viewed at feed size.
Fog Lights Photo Editing Prompt Troubleshooting
If the result looks like a sticker, the subject may be too large, too bright, or placed without regard to the background perspective. Reduce the scale, preserve more surrounding space, and request shadows that follow the template rather than adding a generic shadow.
If the face looks unfamiliar, simplify the instruction set around identity preservation and use a clearer source portrait. If the lighting is wrong, remove any request for automatic color enhancement and make the background the sole lighting reference. This prevents the editor from adding colors that are not present in the original scene.
Another frequent issue is excessive smoke. Fog can create attractive separation, but it should remain transparent enough to show the lower silhouette. Ask for gentle atmospheric depth with limited foreground haze rather than a thick cloud across the entire frame.
Fog Lights Photo Editing Prompt FAQ
What is a fog lights photo editing prompt?
It is an instruction set for creating a portrait with glowing light circles, colored illumination, and atmospheric smoke. The prompt typically guides an AI editor to blend a person into a prepared background while preserving identity, proportions, and realistic light.
What size should I use for an Instagram fog lights portrait?
A 1080 by 1350 pixel canvas, using a 4:5 ratio, is a practical choice for a vertical feed post. Keep the face away from extreme edges so platform cropping does not remove important details.
Final Fog Lights Photo Editing Prompt Tips
A convincing result depends less on adding more effects and more on controlling the relationship between the person and the background. Preserve the original identity, let the template determine the light, and use smoke as a depth tool rather than a distraction.
With a careful fog lights photo editing prompt, you can create an atmospheric portrait that feels polished, modern, and ready for social media. Prepare two compatible images, test the workflow, and share your strongest version with your audience today.
Leave a Reply