Instagram Layer Photo Editing: Easy AI Prompt Guide
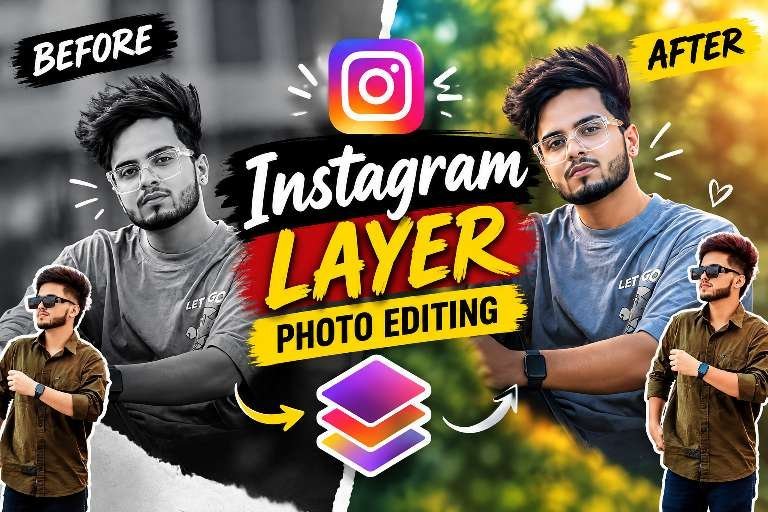
Instagram layer photo editing turns an ordinary portrait into a dramatic social-media composition by combining grayscale depth, a vivid foreground subject, torn-paper shapes, and carefully controlled light. The finished image feels part poster, part album cover, and part personal profile artwork. With a well-written AI prompt and three carefully chosen photos, you can build this effect without guessing where every layer should go.
The key is not simply adding more effects. A convincing composite depends on clear image roles, believable scale, clean masking, and enough empty space for the existing design to remain readable. This guide explains how to prepare the photos, write the prompt, correct common AI mistakes, and polish the final result for a reel cover, profile image, or post.
Instagram Layer Photo Editing: What Makes the Style Viral?
This style works because it creates visual contrast in a single frame. The upper subject adds scale and mood, while the lower subject gives the viewer an immediate focal point. A monochrome layer recedes naturally, whereas the color foreground appears closer and more energetic.
Read Also: Ganesh Chaturthi Photo Editing Prompt: Easy Guide | Ganpati Bappa VN Code: Easy Instagram Reel Guide
The background also plays an important role. A dark upper region can support a portrait without competing with facial details, while a warm glow adds atmosphere. The torn-paper divide then gives the composition a tactile, handmade quality that is easy to recognize in fast-moving social feeds.
Good edits usually share four traits:
- Clear hierarchy: one person is large and atmospheric, and the other is sharp and dominant.
- Controlled color: the rear layer stays muted while the front layer retains natural clothing and skin tones.
- Clean separation: hair, hands, shoes, and clothing edges do not dissolve into the background.
- Protected design space: existing typography and decorative elements remain visible and uncluttered.
How to Plan an Instagram Layer Photo Editing Composition
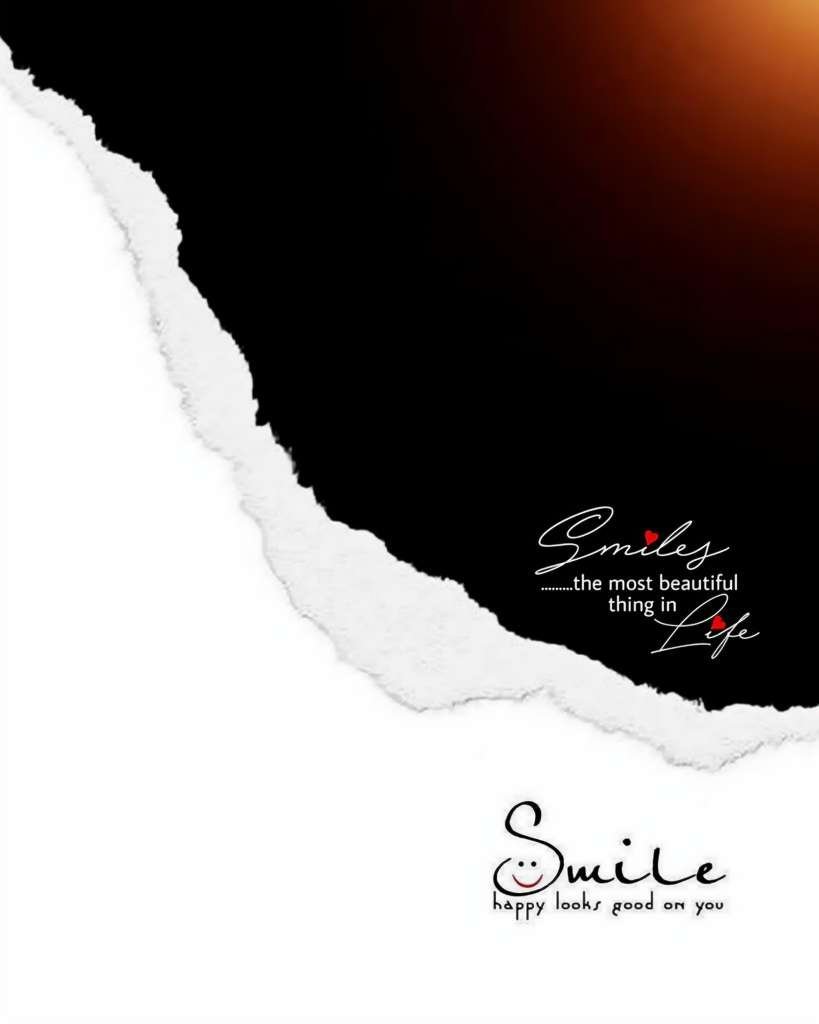
Before opening an editor, decide which photo belongs to each visual role. The first image should be the finished background or preset-inspired canvas. It acts as the fixed foundation, so its typography, color blocks, road area, paper edge, and lighting should stay intact.
The second image becomes the large upper layer. Choose a portrait with a recognizable face, useful clothing detail, and enough visual information to blend into a dark environment. It can be treated with a soft monochrome finish, but it should still look like a real photograph rather than a vague silhouette.
The third image is the lower front subject. A full-body photo is easiest to use, although a half-body portrait can work if the editing tool can extend missing areas naturally. This subject should remain colorful, crisp, and large enough to carry the visual focus.
- Place the fixed background first and do not redesign it.
- Position the grayscale portrait high in the frame, behind the front subject.
- Remove the front subject’s original background with a precise mask.
- Set the front subject near the lower area with comfortable space above the existing Smile text.
- Check feet, shadows, scale, and perspective before applying final color adjustments.
Instagram Layer Photo Editing Prompt for Three Images
Use the following original prompt as a starting point in an AI image editor that supports image references. Replace the role labels only when you intentionally want a different composition. Keeping the roles stable prevents the tool from confusing the background with one of the people.
Create one polished vertical portrait composite from exactly three uploaded images. Treat Image 1 as the locked background canvas and preserve its layout, colors, lighting, torn-paper edge, typography, dark upper section, orange glow, and pale lower area without redesigning or adding anything. Image 2 is the large rear portrait: place it high in the composition, keep the person recognizable, use a gentle black-and-white treatment, and blend the complete photo into the dark area with a soft screen-like effect. Do not turn Image 2 into a hard cutout or erase its environmental mood. Image 3 is the front portrait: isolate the person completely, preserve natural identity, clothing, anatomy, and color, then place the subject in the lower foreground at a confident, reference-like size. Keep Image 3 in front of Image 2 and leave a clean, visible gap above the existing Smile lettering. Never merge the two people, distort their proportions, or cover important background typography. Match brightness, perspective, contact shadow, and overall contrast so both subjects belong in the same photograph. Remove only the original background surrounding Image 3, preserve fine hair edges, and generate missing body areas only when the crop genuinely requires them.
A prompt becomes more reliable when it describes priorities rather than a long list of decorative effects. The background must have the highest priority, the upper portrait must remain behind, and the lower portrait must remain in front. Those instructions establish a visual order that the tool can follow.
How to Prepare Photos for a Clean Layered Portrait
Image quality has a direct effect on the final composite. Use sharp, well-lit photos whenever possible, and avoid faces hidden by heavy shadows, sunglasses, or extreme motion blur. A simple portrait with a clear outline is often more useful than a highly posed image with distracting objects around it.
For the upper layer, a darker or softly blurred environment can be an advantage because it blends into the background. However, the face should still have enough contrast to remain identifiable. For the lower subject, choose an image with visible shoes or a clear lower body if the design places the person on a road or pale ground.
Before uploading, check these details:
- Crop out unrelated screenshots, borders, and interface controls.
- Use photos with a similar general viewing angle to reduce perspective problems.
- Keep clothing patterns intact so the subject still feels authentic.
- Choose a front image with enough space around the body for accurate isolation.
- Avoid two photos with hands or limbs positioned so closely that the AI may combine them.
If manual finishing is needed, a layer-based application such as Adobe Photoshop gives you control over masks, opacity, blend modes, and contact shadows. The same principles can also be applied in mobile editors that offer background removal and layer positioning.
Instagram Layer Photo Editing Workflow for a Natural Finish
Start with the background at its original dimensions. Do not stretch it to fit a portrait unless the crop is unavoidable, because distortion can change the relationship between the paper edge, road area, and typography. Lock this layer as soon as it is placed.
Next, add the upper portrait and reduce its visual intensity rather than deleting its background. A soft monochrome conversion, moderate opacity, and a screen-style blend can allow dark areas to recede while retaining the atmosphere of the original photo. Keep the face and hair detailed enough to read at thumbnail size.
Now isolate the lower subject. Zoom in around hair, fingers, jacket edges, and shoes, since these areas reveal rough masking most quickly. Place the person in the foreground, then move the layer vertically until the feet feel grounded and the gap above the existing lettering looks intentional.
Finish by matching the light. If the background glow comes from one side, add a subtle highlight to that side of the subject and a restrained shadow below the feet. Do not overuse glow, blur, or sharpening; realism usually comes from small adjustments rather than dramatic filters.
| Layer | Recommended treatment | Main goal |
|---|---|---|
| Background canvas | Keep original design and text | Preserve the visual framework |
| Upper portrait | Soft grayscale and gentle blending | Create depth without distraction |
| Lower portrait | Clean cutout and natural color | Make the main subject stand out |
Common Instagram Layer Photo Editing Problems and Fixes
The upper person looks pasted on. Reduce contrast slightly, soften the layer edges, and match the background brightness. A complete environmental layer often blends more naturally than a sharply isolated silhouette.
The lower person becomes too small. Increase the subject to a confident foreground scale before changing the position. Creating more space around the text should usually come from repositioning, not shrinking the person.
The AI changes the face or clothing. Use a clearer source photo and explicitly request identity, facial structure, hairstyle, clothing design, and body proportions to remain unchanged. If the tool offers an edit mask, protect the face and important garment details.
Hands or limbs look incorrect. Supply a photo with visible anatomy and ask the tool to generate only the missing areas. Inspect the result at full size for duplicated fingers, bent joints, floating shoes, or unnatural connections between the two subjects.
Text becomes covered or altered. Treat the background as a locked layer and tell the editor not to recreate, move, or modify existing typography. Leave a deliberate empty zone between the front subject and the lettering.
Instagram Layer Photo Editing Compared With Other Portrait Styles
A conventional double exposure often merges two images across the whole frame, creating an abstract result. This layered poster approach is more structured: the upper portrait supplies atmosphere, the lower portrait supplies identity, and the background dictates the composition.
A standard cutout edit, by contrast, usually places one person over a new background. The layered method adds depth through a second subject, grayscale treatment, controlled blending, and a designed transition. It therefore works especially well for profile banners, reel covers, birthday posts, and personal branding graphics.
For inspiration on visual composition and image layering, you can also explore the broader history of photo manipulation. The goal is not to imitate one fixed template, but to understand how contrast, scale, and visual hierarchy guide attention.
Instagram Layer Photo Editing FAQ
What is the best Instagram layer photo editing prompt?
The best prompt clearly assigns each uploaded image a role, protects the background, and explains which subject belongs in front or behind. It should also describe masking, identity preservation, scale, lighting, and the spacing required around existing text.
How many images are needed for this layered portrait effect?
This composition is designed around three images: one prepared background, one upper portrait, and one lower foreground portrait. Using a fixed number of references helps the editor understand the intended hierarchy and reduces accidental substitutions.
How do I keep the person natural in an AI photo edit?
Use a sharp source image and instruct the tool to preserve the face, hairstyle, clothing, proportions, and pose. Ask for new pixels only where a crop leaves a genuine gap, then inspect hands, feet, facial features, and garment edges before exporting.
Can I create Instagram layer photo editing on a phone?
Yes. A mobile editor can handle the effect if it supports image layers, background removal, masking, opacity, and basic color controls. Work at a high resolution, keep the background locked, and zoom in for edge cleanup before saving a social-media version.
Instagram Layer Photo Editing: Final Tips for Better Posts
Successful Instagram layer photo editing is less about piling on filters and more about making every layer serve a purpose. Protect the original canvas, use the upper portrait for atmosphere, keep the lower subject clear and colorful, and preserve enough breathing room around the existing design.
Export a high-resolution master first, then create a compressed copy sized for the platform where it will appear. Review the image on a small screen as well as a large one, because subtle faces, text gaps, and edge defects can look very different at thumbnail size.
Try the prompt with different portrait combinations, compare the results, and refine one instruction at a time. Your next Instagram layer photo editing project can become a distinctive profile image or scroll-stopping post—start with three strong photos and build from there.
Leave a Reply